The Essential Guide to Tailor’s Chalk: A Must-Have Tool for Every Sewer
Whether you’re a beginner stepping into the exciting world of sewing or an experienced tailor crafting intricate designs, one tool you’ll find indispensable is tailor’s chalk. This humble yet powerful accessory can make all the difference in achieving precision and professional results in your projects. In this blog post, we’ll dive deep into what tailor’s chalk is, its uses, types, and tips for getting the most out of it. Let’s get started!
What is Tailor’s Chalk?
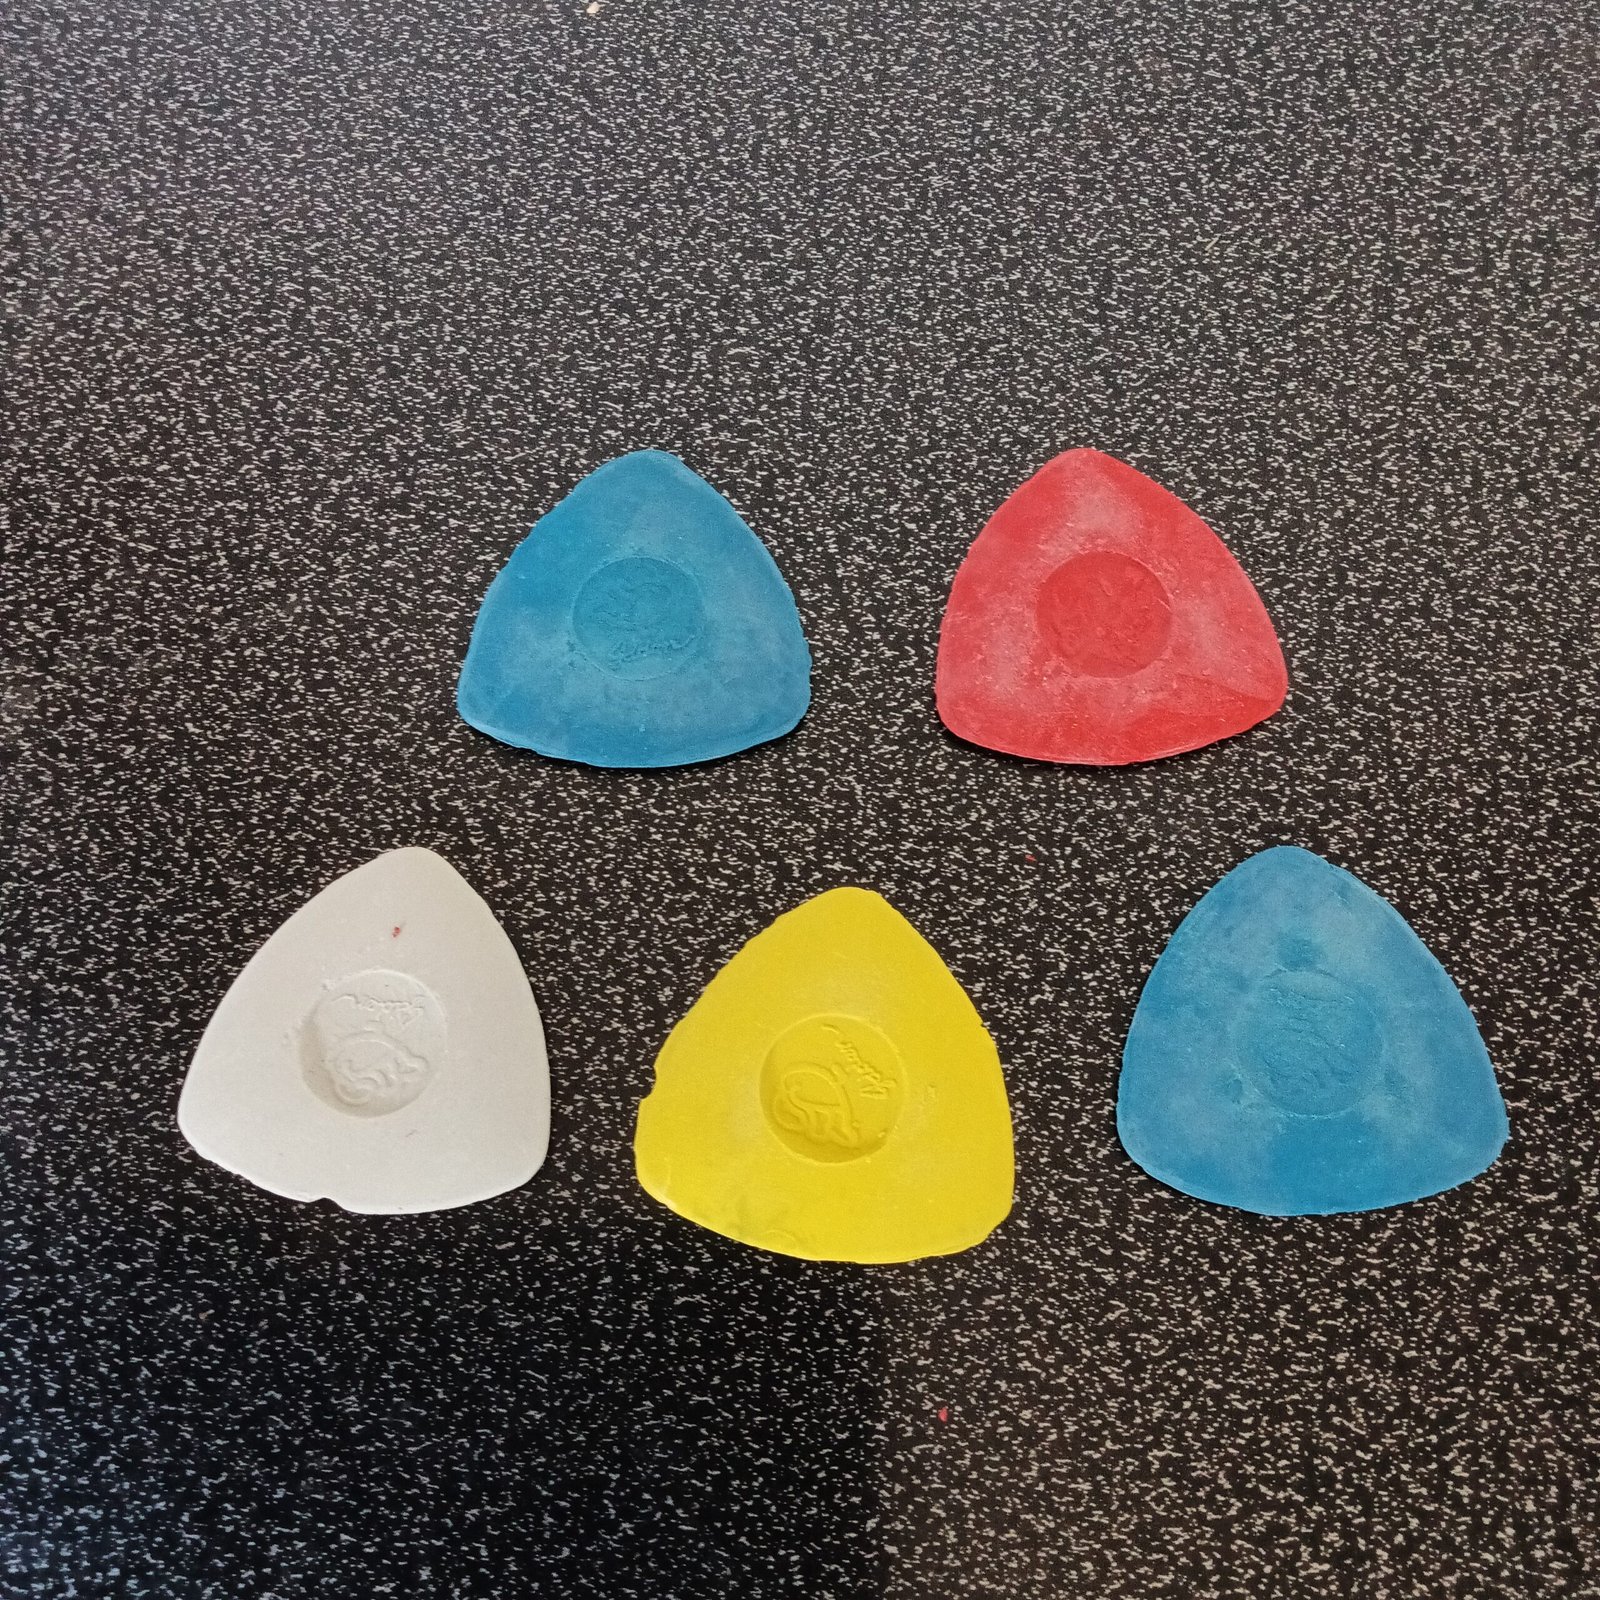
Tailor’s chalk is a type of marking tool designed specifically for fabric. Made from wax, clay, or chalk-based materials, it allows you to mark patterns, seams, and other design elements on fabric without leaving permanent marks. Its temporary nature makes it ideal for sewing projects, as the marks can be easily brushed off, washed away, or ironed out.
The triangular or rectangular shape of tailor’s chalk provides sharp edges for fine lines, while the flat surfaces are great for broader strokes. Available in various colors like white, blue, yellow, and red, tailor’s chalk ensures visibility on different fabric shades.
Why is Tailor’s Chalk Essential?
- Precision: Tailor’s chalk helps you draw precise lines and markings for cutting, stitching, or aligning patterns.
- Fabric-Safe: Unlike pens or markers, tailor’s chalk is non-permanent and won’t damage your fabric.
- Versatility: From marking darts and pleats to creating embroidery designs, tailor’s chalk is a versatile tool that adapts to various sewing needs.
- Ease of Use: Its ergonomic shape makes it comfortable to hold, even during long sewing sessions.
Types of Tailor’s Chalk
Understanding the different types of tailor’s chalk can help you choose the best option for your projects:
1. Traditional Chalk
- Material: Clay or chalk-based.
- Best For: Light to medium-weight fabrics.
- Pro: Easy to remove with a light brush or hand.
- Con: Can be brittle and prone to breaking.
2. Wax-Based Chalk
- Material: Wax.
- Best For: Heavyweight fabrics like denim or wool.
- Pro: Durable marks that withstand handling.
- Con: Requires heat (ironing) to remove.
3. Chalk Pencils
- Material: Similar to traditional chalk but encased in pencil form.
- Best For: Intricate designs and detailed work.
- Pro: Great control for fine lines.
- Con: May require sharpening frequently.
4. Chalk Wheels or Pens
- Material: Powdered chalk dispensed through a wheel or pen.
- Best For: Continuous lines or curves.
- Pro: Clean application without smudging.
- Con: Slightly more expensive than other options.
How to Use Tailor’s Chalk Effectively
- Test First: Always test your tailor’s chalk on a scrap piece of fabric to ensure it doesn’t stain or leave residue.
- Choose the Right Color: Use a contrasting color to your fabric for maximum visibility.
- Mark Lightly: Apply gentle pressure to avoid embedding chalk deeply into the fabric.
- Keep it Sharp: Sharpen your chalk edges with sandpaper or a blade for accurate lines.
- Store Properly: Keep your tailor’s chalk in a dry, cool place to prevent it from breaking or melting.
Pro Tips for Beginners and Advanced Sewers
- For Beginners: Start with traditional tailor’s chalk. Its simplicity and ease of removal make it beginner-friendly.
- For Advanced Sewers: Consider using a chalk wheel or pen for detailed and professional-level projects.
- Cleanup Matters: Use a soft brush or damp cloth to clean off chalk marks post-sewing. For wax-based chalk, use an iron to melt and lift the marks gently.
Final Thoughts
Tailor’s chalk might seem like a simple tool, but its impact on sewing precision and design cannot be overstated. By understanding the types, applications, and best practices, you can elevate your sewing projects to new heights. Whether you’re stitching your first hem or crafting a couture masterpiece, tailor’s chalk will be your trusty companion.
So, grab your tailor’s chalk and start creating with confidence today! Have any tips or experiences with tailor’s chalk? Share them in the comments below.